A while, actually quite a long while ago, I promised a friend I would show her how I do a provisional garter tab cast on.
It is really hard to take photo's of your own hands, so instead I just showed her very quickly one day when her knitting group was cancelled (or limited to three and moved to my house!)
I actually use a cast on very similar to this one, that Andrea Jurgrau posted on her blog many years ago...except....there was one day when I had grabbed yarn and needles ready to cast on for a project while waiting for my kids to see the dentist. The start of a shawl isn't too unwieldy to make into travel knitting so into the bag went the yarn, the needles and the first portion of the pattern.
I was not going to sit through their checkups and cleaning with nothing to do, so even though I didn't have a spare double pointed needle to do the actual knitting I figured I would try a "more modified" turkish cast on than Andrea originally intended.
Want to give it a try?
You will need :
Your Yarn.
Your working needle.
That's it. No crochet cotton, no smooth waste yarn, no extra needles. Just your yarn and your needle. For the pictures I just grabbed the first available ball of yarn and some (too small for the yarn) needles - like these.

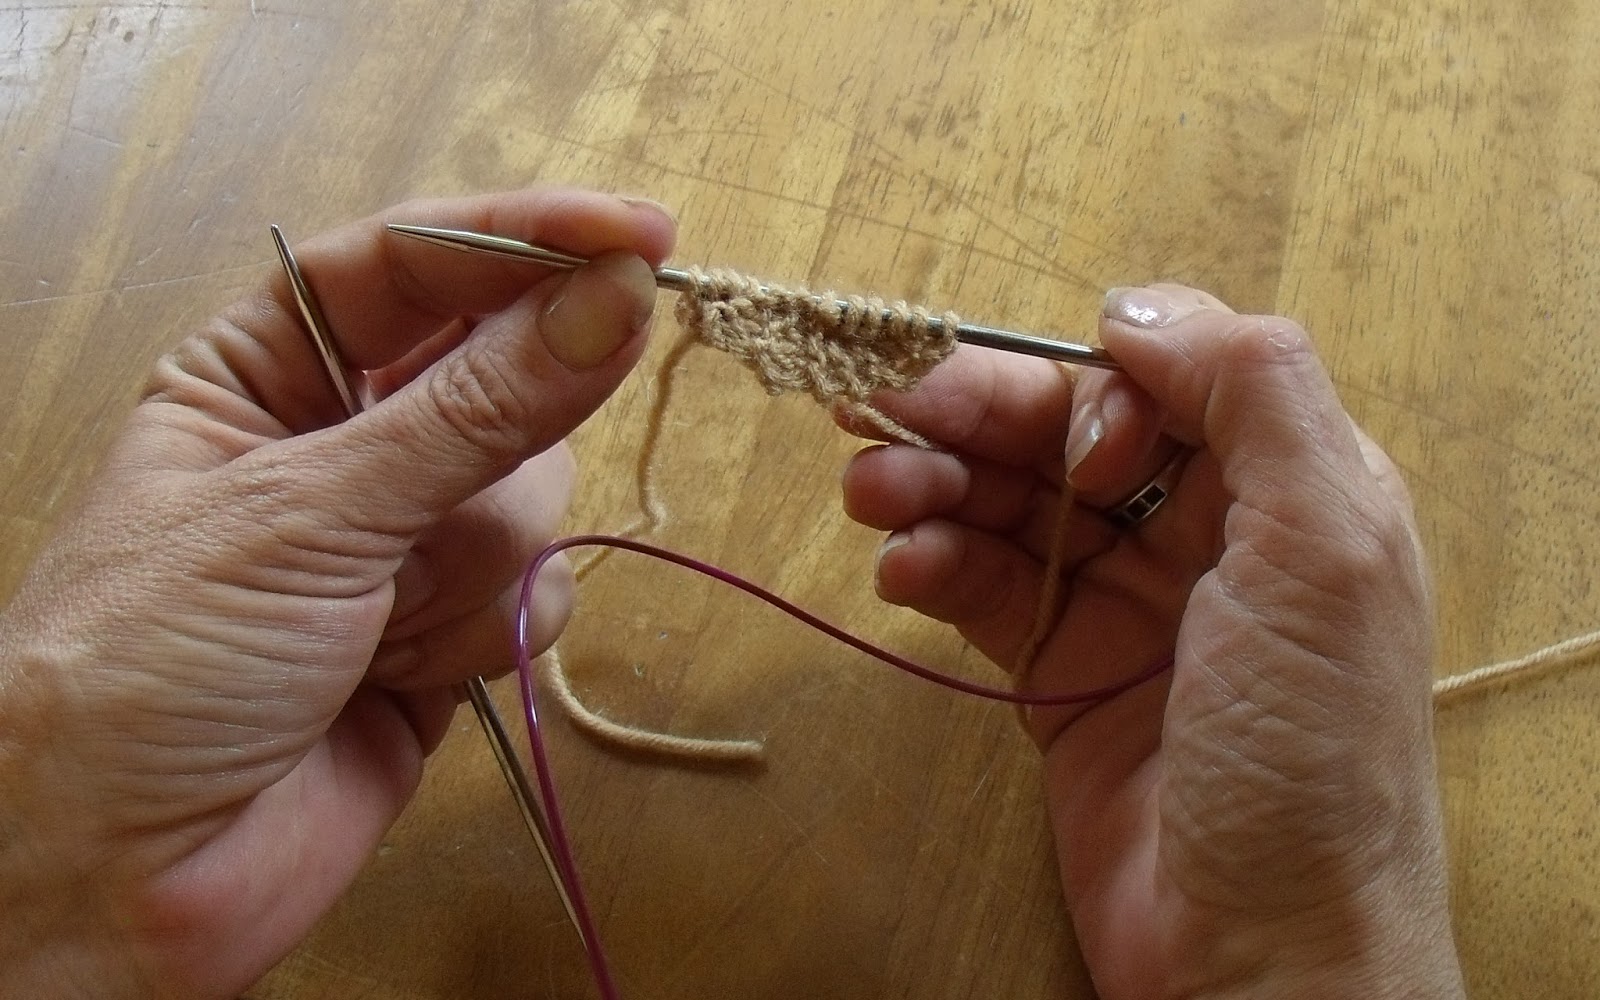
Make a slip knot and put it over the tips of both needles from your circular needle.

Now you are going to make some half hitches. See how I have the working yarn wrapped around my finger, just like that and put it on both needle tips...like this....

Now pull that snug and add a few more,

In this case I need three stitches for each of my borders so I am putting 3 half hitches on the needles.

I know, you see four stitches there but we are not counting that slip knot. Really! Trust me this will work.
Now thread your working yarn between the needle tips.

And pull the lower needle out so that the half hitches are on the top needle and the cable.

Now you are ready to knit the first row of however many rows you need for your garter tab. In this example I wanted to end up with 3 garter stitches on each side of a six stitch body so I knit 13 rows. Why 13 you ask? Go, on ask!

Because I want to have 6 garter ridges, which means 12 rows of garter stitch to create those ridges and I want to be ready to start picking up right after I finish that last row.

Knit three stitches and then just let the slip knot sit on the cable.

Eventually you end up with a long strip of garter ( a mini scarf!) between the tips of your needles.
And you are ready to pick up your "body" stitches. Remember this time I was aiming for six and I am going to use that bottom needle, to pick up the stitches before I knit them. I grab the bars from the garter ridges and put them on the needle like this...


And then purl across to the slip knot. (The astute among you will see I only picked up 5 stitches, I can't count worth beans some days!)

You knew it was going to show up again somewhere, right?

That slip knot has done its job and started our half hitches with a firm base, but now we don't need it any more, so we are going to slide it right off the tip of the needle when we get to it and then knit those last three stitches that have magically appeared from our provisional cast on.
Now we are ready for row one of our pattern, with all the stitches ready to be worked. Three garter stitches for the edge, six body stitches for the body and another three garter stitches for the final edge.
Easy, right?
And all because I didn't have waste yarn or a few spare needles in my knitting bag. Necessity really is the mother of invention.
~M
No comments:
Post a Comment